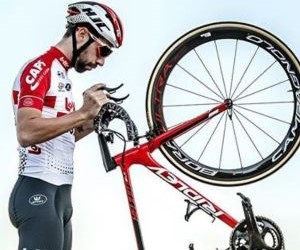
Master the art of mid-race bike changes in long individual time trials to gain time, manage terrain, and outsmart rivals with tactical precision.
WHAT ARE THE BEST TRAVEL TIPS FOR FLYING WITH A BIKE?
Flying with your bike opens up a world of two-wheeled adventure—but it comes with logistics that can trip up even seasoned cyclists. From packing hacks and airline fees to dealing with TSA and reassembly at your destination, this guide covers the best travel tips for flying with a bike. Whether you’re heading to a race, a training camp, or a cycling vacation, these strategies will help you protect your gear, reduce hassle, and keep your trip on track. Ride-ready starts at the airport—here’s how to get it right.

Choose the right bike case or bag
The foundation of flying with your bike is selecting the right travel case or bag. Your choice affects everything—from how easy it is to pack and roll through the airport, to how well your bike survives baggage handling. There are three main options, each with pros and cons based on budget, protection, and airline rules.
Hard case vs soft bag vs cardboard box
Your bike's safety depends largely on how it’s packed. Choose based on the level of protection you need and how often you’ll travel.
Hard case: Best protection from impact, ideal for frequent flyers or high-value bikes. Downside: bulky and heavier.
Soft bag: Lighter, more compact, easier to store. Offers decent protection if padded well inside.
Cardboard box: Cheap or free from bike shops, but offers the least protection and may not survive rough handling.
Always remove pedals, wheels, handlebars, and the rear derailleur if possible. Protect key components with foam, bubble wrap, or dedicated inserts. Add “fragile” stickers, but don’t rely on them alone—pack assuming your case will be dropped.
Navigate airline policies and fees
Every airline has different policies when it comes to traveling with bicycles. Some treat them as regular checked baggage, while others charge oversized or sports equipment fees. Knowing the rules ahead of time helps you avoid surprises, delays, or steep charges at the airport.
How to plan around airline bike rules
Do your research early. Some budget airlines may offer low ticket prices but hit you with triple-digit bike fees. Others are bike-friendly with fair or waived charges. Consider airline choice part of your cycling trip strategy.
Check weight and size limits: Most cases must stay under 50–70 lbs (23–32 kg) and within 115 linear inches.
Book early and notify airline: Some carriers require you to pre-register oversized items like bikes.
Bring printed policies: If staff are unsure, having official wording can prevent disputes at check-in.
Watch for connecting flights: Partner airlines may have different handling or fees.
Consider travel insurance: Protect your bike from loss or damage during transport.
Pro tip: Some airlines waive bike fees if the case fits within standard baggage dimensions and weight. A well-packed soft case can make a big difference here—especially for domestic travel.
Reassembly, gear checks, and local riding tips
Once your flight lands, the final phase of your travel plan kicks in: reassembling your bike and ensuring it’s road-ready. A good post-flight checklist prevents mechanical issues and ensures your first ride at your destination goes smoothly. You should also be prepared for local riding conditions—from traffic rules to terrain and climate.
Getting ride-ready after you land
Reassembly isn’t just about putting your bike back together—it’s about checking for damage, tuning components, and adjusting to new riding environments. Always set aside time for this before your first big ride.
Inspect frame and wheels: Look for cracks, dents, or spoke issues before riding.
Torque bolts properly: Use a torque wrench to secure bars, stem, and seatpost correctly.
Re-inflate tires: Cabin pressure can drop PSI—check levels before your first ride.
Bring essential tools: A mini torque wrench, multi-tool, and pump go a long way.
Know local road rules: Some countries require helmets, lights, or specific lane use.
If possible, test the bike with a short shakeout ride before any long distances. For added peace of mind, find a local bike shop near your destination in case you need help with tuning or damage repairs. Be aware of weather, altitude, and terrain differences that could affect your pacing and hydration.
YOU MAY ALSO BE INTERESTED


